Branches, roles and audit trail
Built for a lab with more than one room and more than one person who can sign. Branches sit under one account, every screen is permission-checked on the server, and the audit trail is written by the system rather than by the user.
Branches under one account
Orders, samples and reports are recorded against a branch, and a report template can belong to one, which is how two branches print the same results on different letterheads. A user with no branch rows sees the whole organisation; give them rows and they see only those branches.
Branch membership rows scope a user; a user with no rows has organisation-wide access.
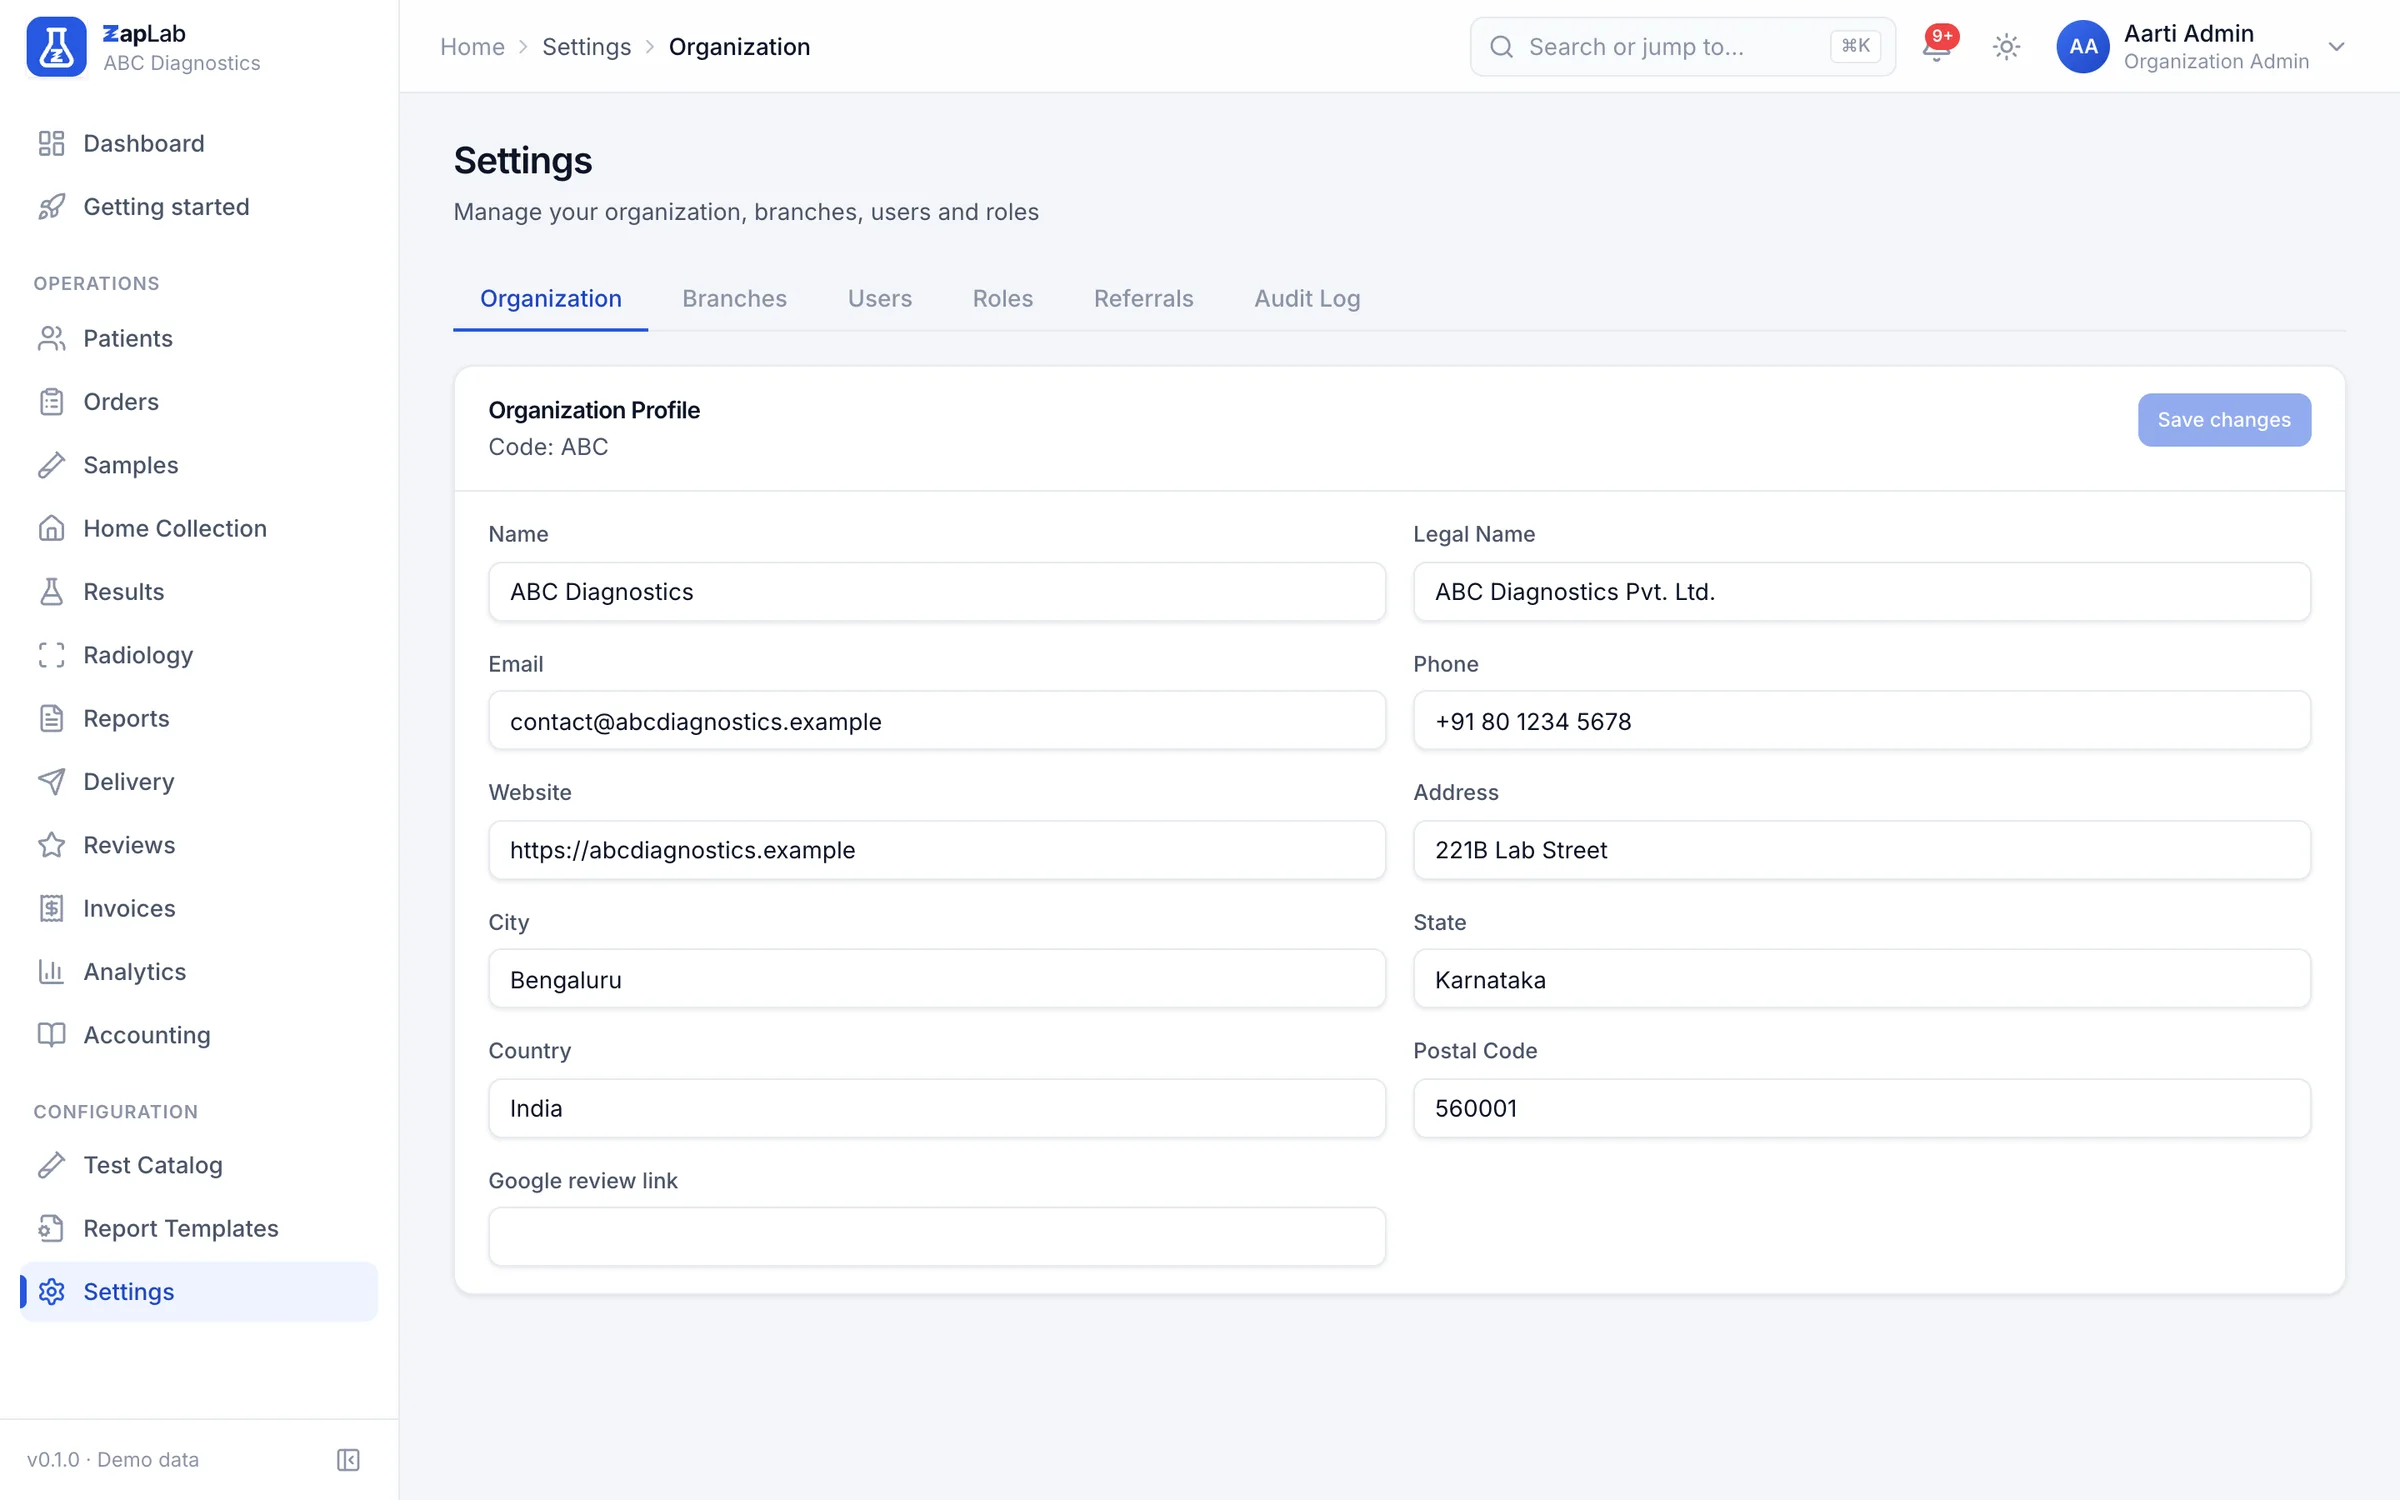
The lab a request belongs to comes from the token
The organisation identifier is read from the verified login token, never from the request body or a query string, and every tenant query is scoped by it. A client cannot ask for another lab’s data by changing a field, because there is no field to change.
Roles with a ceiling, and permissions you can edit
Owner, administrator, branch manager, receptionist, phlebotomist, technician, pathologist and referral doctor each start from a default permission set, and an administrator can edit those sets for their own lab. Some permissions and some roles are locked, and nobody can grant a role above their own.
Deactivate someone and their sessions stop working
Access tokens are checked against the user record on every request, not just for a valid signature. Deactivating a user, changing their role or resetting their password marks earlier tokens dead, so an open laptop in the sample room stops being a way in.
An append-only audit trail
Entry, verification, approval, release, amendment, print, delivery, sign-in, role change and configuration edit are all written with the user, the time, the record and the old and new values. The trail is append-only and the application never offers a way to edit it.
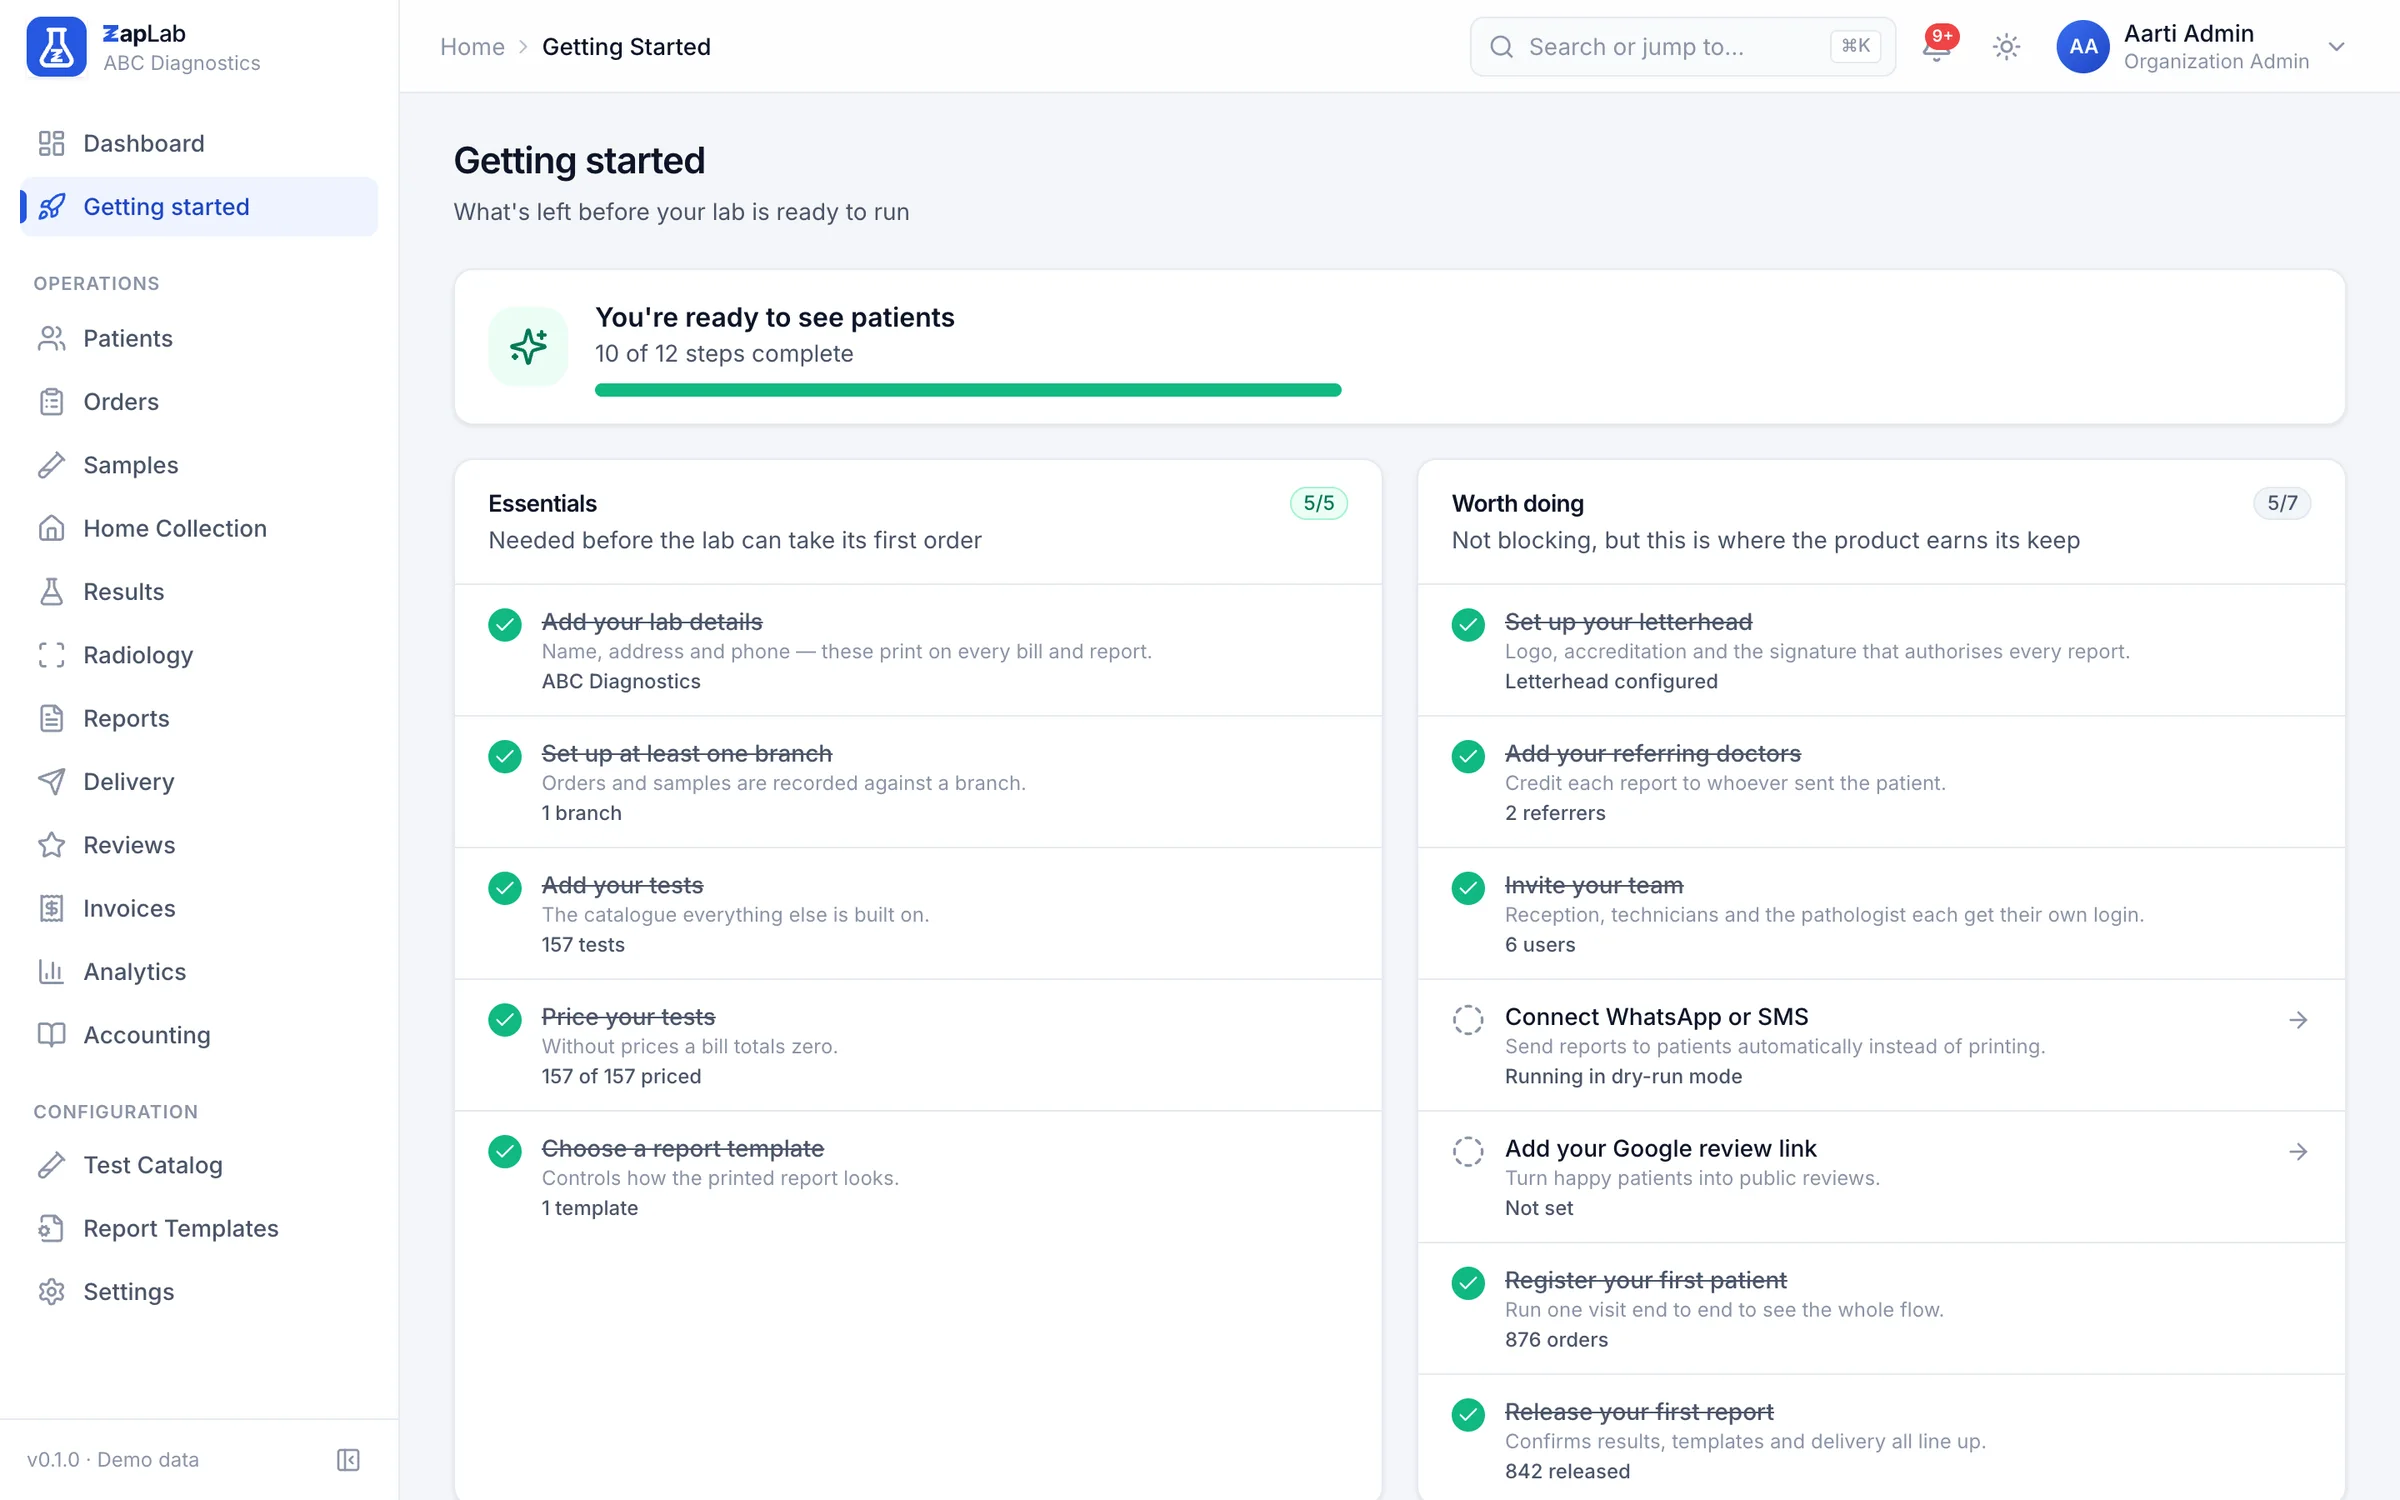
A setup checklist so nothing is left half-configured
Getting started is a list with a state, not a wizard you can skip: lab details, a branch, tests, prices, a report template, users and a delivery channel, each marked done or not with the reason. A lab that is priced but has no template is told so before its first bill.
The setup checklist computes each step from the data, so it cannot be ticked off by hand.
What this does not do yet
Labs ask for all of these. None of them work today, so none of them are counted as features anywhere else on this site.
- No single sign-on. There is no SAML, no OIDC and no Google Workspace login: sign-in is email and password, rate-limited.
- No two-factor authentication, and no hardware key support.
- No per-branch rate list. Prices are one list for the whole lab, so branch-level pricing is not possible yet.
- One role per user. A person who works reception on Tuesdays and runs the analyser on Fridays needs two accounts.
- No IP allow-list, no working-hours restriction and no device registration.
Where to look next
Two ways to check this page against something concrete: the formats themselves, and the comparison that covers this part of the product.
Related report formats
- Urine Culture and Sensitivity report format
Microbiology · Urine · 2 days turnaround
- Histopathology Examination (Biopsy) report format
Histopathology · Tissue / Biopsy · 3 days turnaround
- Fine Needle Aspiration Cytology (FNAC) report format
Histopathology · Smear / Slide · 2 days turnaround
Compare
What installed offline lab software does well, where this system wins, and the rows where it does not.
Set up your lab this afternoon.
Create your organisation, add your tests, print the first barcode. If you would rather see it first, ask for a walkthrough.